No.111 / Fred
'03 DUCATI Desmosedici
2seater (Ducati Corse / R.MAMOLA)


My project is to try to reproduce the Ducati Desmosedici 2003 Two seater rode by ex GP500 rider Randy mamola. This bike was built by Ducati Corse to entertain VIP's, journalists and guests at special GP (Imola...). Mamola made the inauguration of the Qatar circuit with this model. The two seater is based on the Racing Desmosedici, main differences are the second seat, the modified fuel tank, additionnal footrests and a few modifications here and there. I will do my best to try to reproduce. I am a begginer, this will be my first attempt at scratch building so please be nice ;)


Picture of the Heller Kit (definetly poor quality) and the profiles of the desmo from the Pitwalk


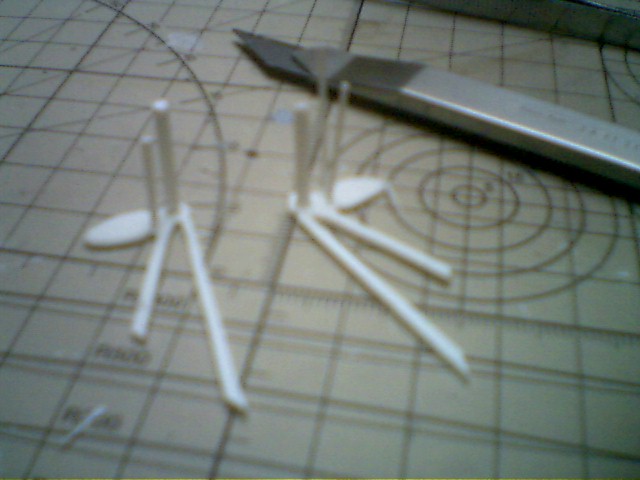
Some of the tools I used

This picture was my first action, i started by cutting the back of the tail to create the passenger seat


Global picture of the body, a little sanding is done


I started sanding a lot and finishing up the body. I switched to gray primer to see more clearly the defaults and I started creating a place for the handles


Other view, the left one I had to redo, because the alignment was wrong


The body is starting to look like something decent. As you cann see I holed out the tank cap to replace itby a nicer one, handles and lines are looking ok


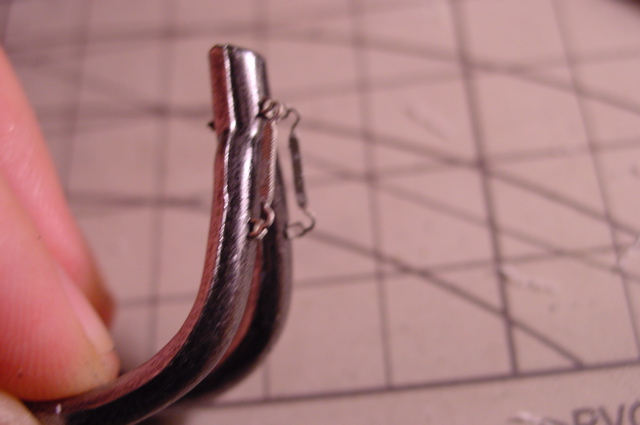
While I has some time I satred improving the Pipes, I added som plactic strip (heated plastic tubes with a candle and streched) to simulate pipe welding, still needs some glue and sanding

I also started working on the wheels and started wearing off those tires
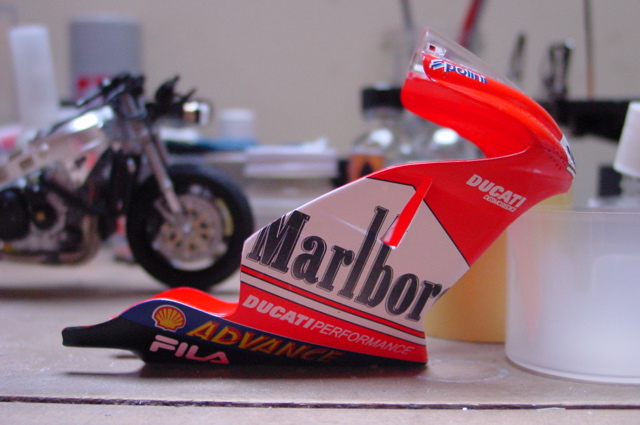
Lastly I started working on a first trial for the Fairings. I used Tabu
Design decals and the Heller ones. The Paint is Tamiya TS-49 with TS-14
Gloss. I am a little disapointed with the decals, they "drip"
a little .
And yes it is a Yoshimura Busa in the back (I was waiting for the paint to dry so I built one ;-)

And also as you can see, there is a little problem I have to fix : the bottom of the malboro is not parallel to the "Advance"

On the Front Fairing I drilled some Holes to add realism and to replicate the bike used by mamola in hot conditions (mugello and sepang I believe)

Right Side of the fairing, same parralelisme problem. And I also still have to paint the inside

Here's a little update,
I painted a bit of things to see how it looks like, you can see the exhaust pipes painted (I used black enamel humbrol and Alcad II Metaliz er
(Polished Aluminium for first coat and a little bit of burnt metal for secand coat)

You can see the pipe � little bit more clearly on this picture. I sanded a little bit of the welding, but I added some glue to add realisme to the welded parts. It is still in wip I have the springs to attach

On this picture
you can see some od the work i did this weekend. I decided to use the
Yamaha M1 front fork, the brakes are also exactly the same and they
are much more detailled.
S o I will have to som work on the top of the fork to make it fit, but
I think it will add to the realism and to the overall look of the kit.
You can also see
the pipes I have created using miliput and plastic pipes. These are
intended to replicate the coolants hose and tubes of the radiotaor wich
are totally absent in this kit.
I also started working on the passenger footpegs, the first trial I made with miliput was not working so I used plastic sheet (1.5 mm) and cut the two footrests.

On this closeup you can see the work I did on the hose , the footrests and the rear spring which I re-crated totally as the one in the Heller kit is really looking terrible
This
picture is bad (Taken with my phone) but you can see how I created the
different details of the footrests.
I used plastic Tubes (Evergreen to create the actual footrest and two
smaller evergreen tubes to simulate the screws that lie on top fo the
footrest.
After I will cut the two smaller tubes very short to create the "button" effect.

So I decided to drill the holeon the top of the fork, to gain realism and depth


On the original bike the tubes are red so I will have to paint them.

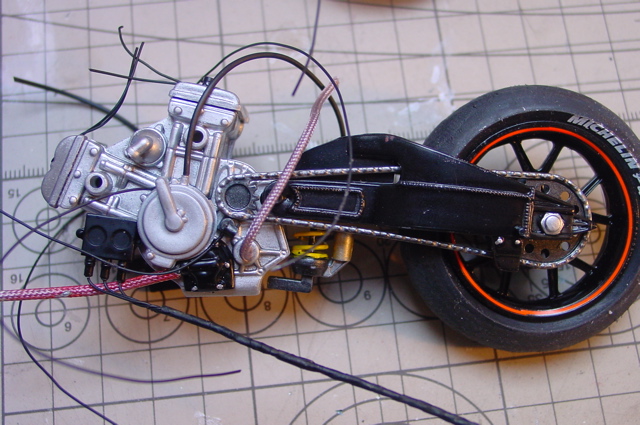
When I assembled the engine, I thought : "What, that's all !". There is really not much to work with. So I decided to add some more details and cabling to the engine.
I started with the spark pluds, using documentation I gathered I could created those wires using old material from RCV Honda.
The cable are thin black cable fomr model master

I was also really disapointed with the tubes that came out of the radiator, So I decided to re-create them using plactic tubed from the plastic trees, I also used miliput to created shapes that could fit to the radiator.
Then I need to make the tube look realistic and show those blue Hose pipes and their clamps. So I used Tamiya Masking Tape, Rolled it around the tube and painte it Tamiya Blue

On this picture you can see the Fairings, which I have finished painting and decaling, It received 4 coats of TS 13 prime coating, it now looks okay.
I also started painting the saddle and tank unit with Tamiya Red, I will paint the handles later.


When I first looked at the rear brake discI got really depressed. Not only was it very poorly detailled but also it missed the holes that the real bike has.
So I had to drill the holes without indications.


I added the aluminum clamps on the additional blue hosing on the pipes.
I used Flat aluminium decal sheet from Model master (I think). The tricky part was to cut them in very small strips, it gets pretty small at this stage.

While
looking at the documentation I also realised thata lot of parts were missing,
so I decided to add some.
I don't really know what this (fuse ?) but I had one extra and it fits
almost perfectly with the missing part I was trying to replace.
So I drilled some holes in each of the tubes, used the model master wiring and wrapped it all together using tamiya masking tape


And we continue....
On this Picture I ahve fixed the rear swing armand the new shock absorber to the frame, some of the wires. I have added the Battery with a piece of platic card covered xith Renaissance carbon decal.
I have also replacer the platic tibu for the radiator by braiderd hoses of model master


Another Big Disapointment of the kit are the Heller decals, Not only can you see on this picture that it is not really precise (Ducati Corse logo is poorly represented) But also it craclkes very easily and doesn't support Micosol.
I am in the preocess of redoing the entire piece because of the decal :(


I started to use a thin coat of TS13 and Smoke to darken a bit the different carbon parts.
Maybe too shiny ?, I will matt them afterwaord if necessary


Because the Deadline is coming very quickly I have to speed up the process :
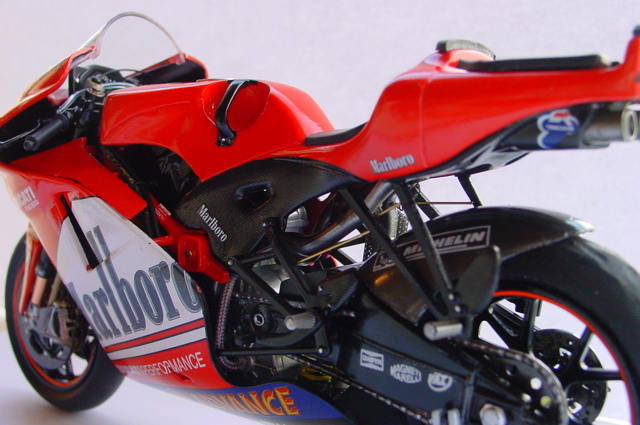
Naked view of right side, with all the wire added and tubes, the exhaust protection


I still have a couple of touch'ups to do (including the Number 2) of Randy, it should all be finished next week
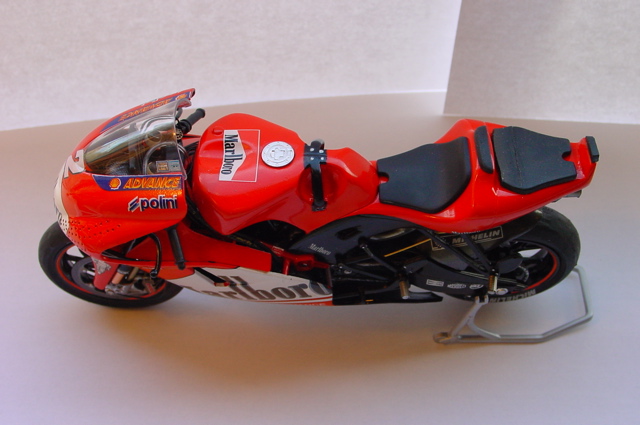
But I already think it looks good in its box ;-)


See you next year ;-), you can see more of my stuff at http://www.homepage.mac.com/screensmoke